3D Printing Instructions
Instructions on how to print with the Ultimaker are provided below. The STL files can be printed on any FDM (Fused Deposition Modeling) printer. If you are using another printer, we recommend using the same settings and orientation shown below. Parts can be printed in either PLA or ABS. Please note these parts are relatively large. You will require a printer with comparable print volume to the Ultimaker 2 Extended+ and may need to switch spools of filament mid-print.
Suggestions for successful Prints
Although parts can be printed in either* PLA or ABS, there is a trade off between ease of print and strength of the printed parts. *It is recommended to print "Link 1" in PLA due to shrinkage.
PLA is the easier of the two materials to print with and does not require any special modifications to your printer. Additionally, parts printed in PLA will shrink less than those printed in ABS.
ABS, while more difficult to print with, will yield stronger parts with higher melting temperatures. If you choose to print with ABS, here are some recommendations:
For general 3D printing issues, a recommended resource to consult can be found here.
PLA is the easier of the two materials to print with and does not require any special modifications to your printer. Additionally, parts printed in PLA will shrink less than those printed in ABS.
ABS, while more difficult to print with, will yield stronger parts with higher melting temperatures. If you choose to print with ABS, here are some recommendations:
- To prevent warping, we recommend installing GeckTek build plates.
- To prevent cracks from occuring, your printer should have a well-sealed heated chamber. If you printer does not have a heated chamber, one can be improvised using sheets of acrylic. The importance of a "well-sealed" heated chamber can not be over emphasized. It is recommended that you use tape to seal any crevices where heat can leak. Additionally, it is recommended that you allow parts printed in a heated chamber to gradually cool down to room temperature as opposed to being removed immediately.
- When starting your print, set your heated bed temperature to 110°C.
- Fan cooling is not recommended.
For general 3D printing issues, a recommended resource to consult can be found here.
Printing on the ULtimaker & Settings
- Download Cura software
- Import STL file into Cura
- Ensure that the object is properly oriented
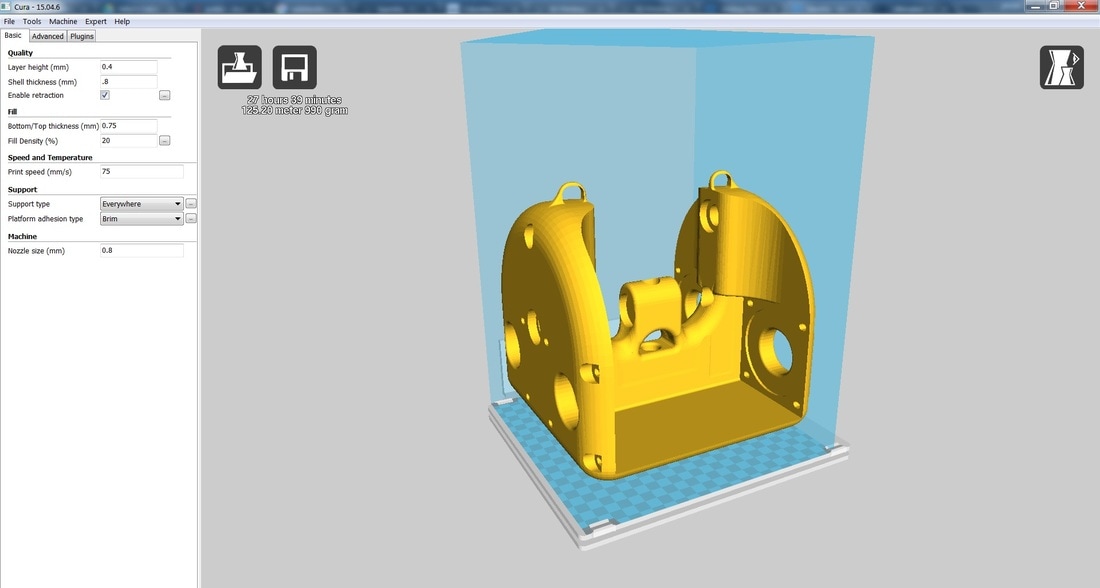
- Calibrate Cura settings (see images below). Please note a 0.8 nozzle is used to hasten the print. Supports are recommended.
- Select "Save to File" to generate the .gcode file the Ultimaker prints with
- Place .gcode onto Ultimaker SD Card
Printing Orientation
We suggest the following print orientations for successful prints.
To change the orientation of the object:
To change the orientation of the object:
- Select the object
- Select rotate
- Move to desired rotation
- Object should snap so that it is flat with respect to the surface

The following orientations and settings are suggested for each part:
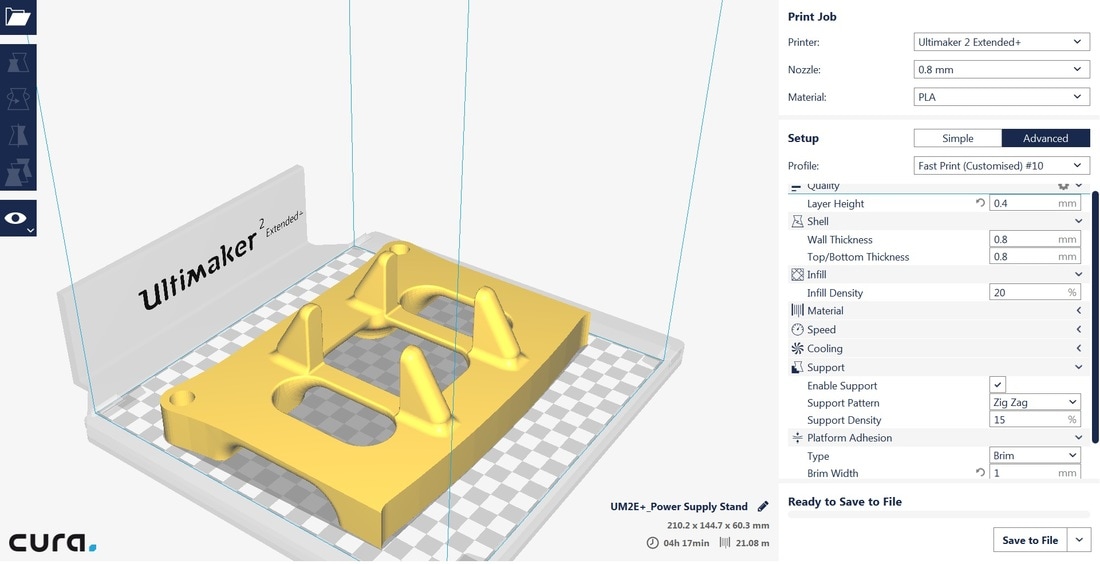
Power Supply Stand Suggested Orientation and Settings
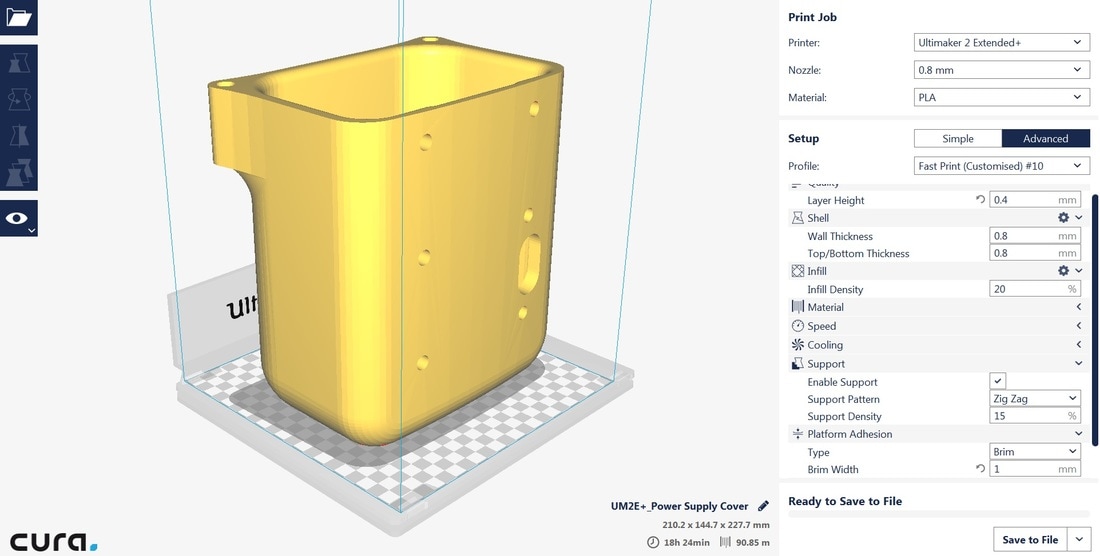
Power Supply Cover Suggested Orientation and Settings
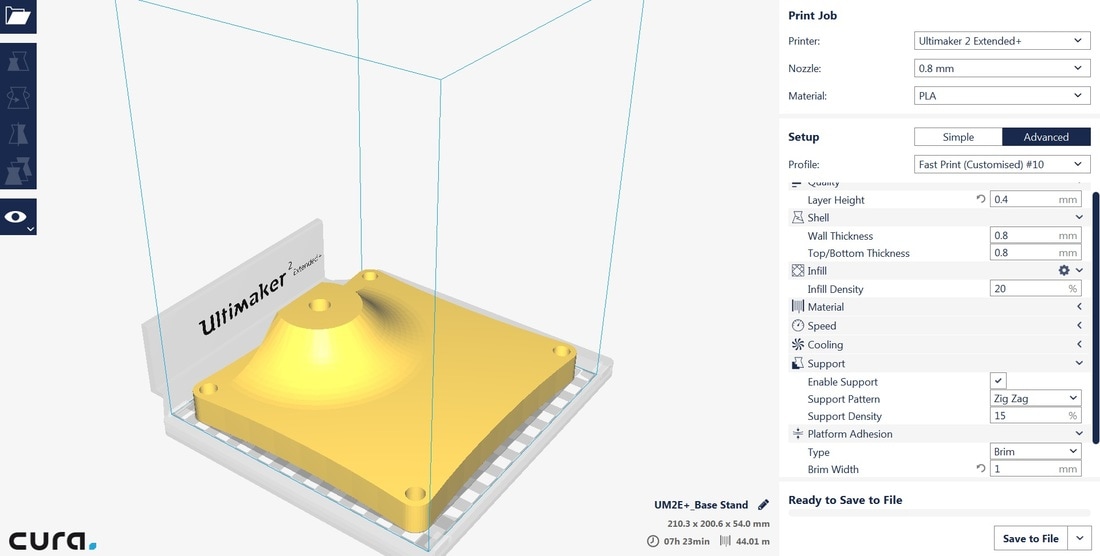
Base Stand Suggested Orientation and Settings
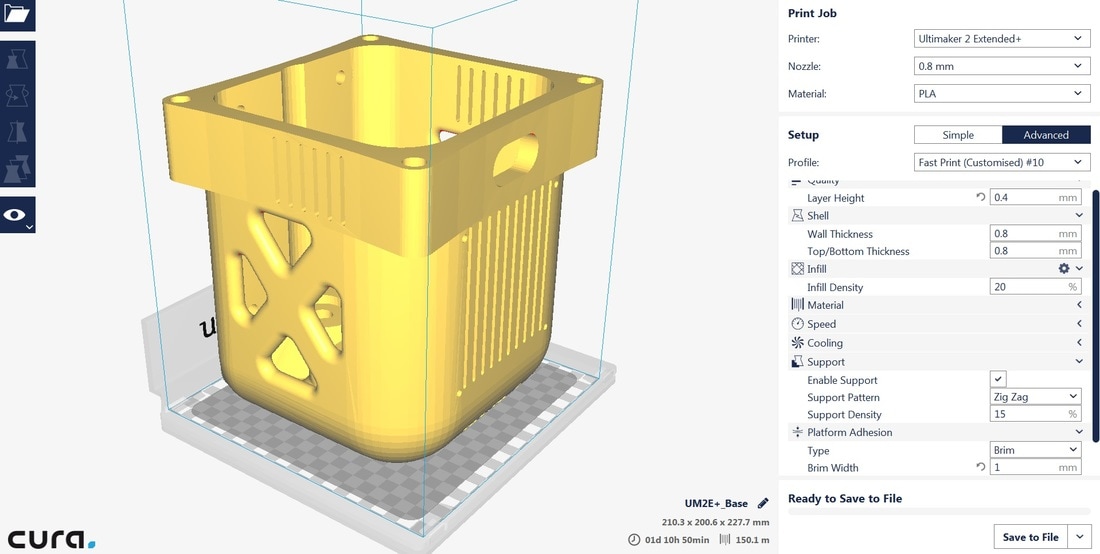
Base Suggested Orientation and Settings
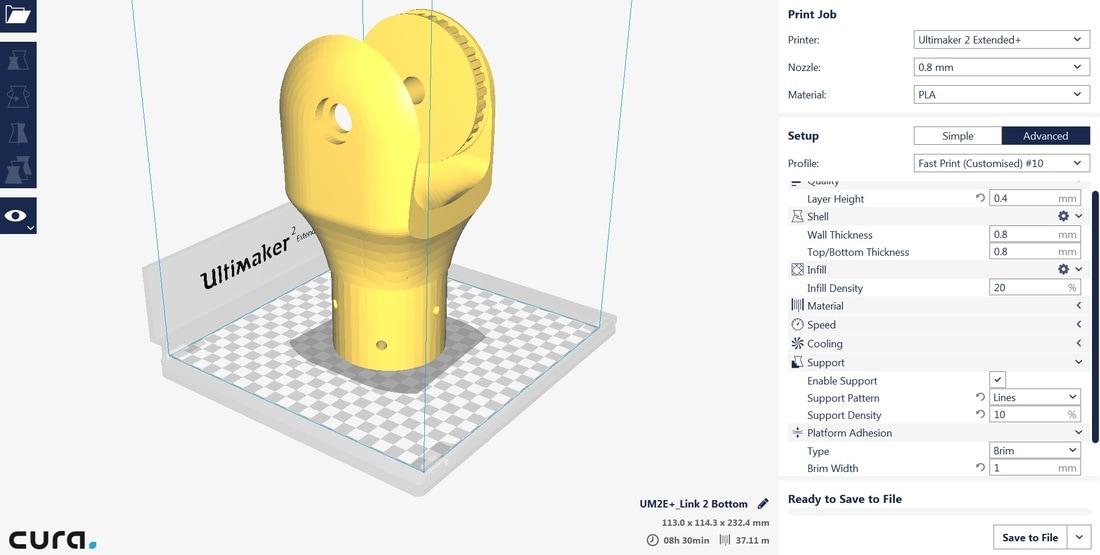
Link 2 Bottom Suggested Orientation and Settings
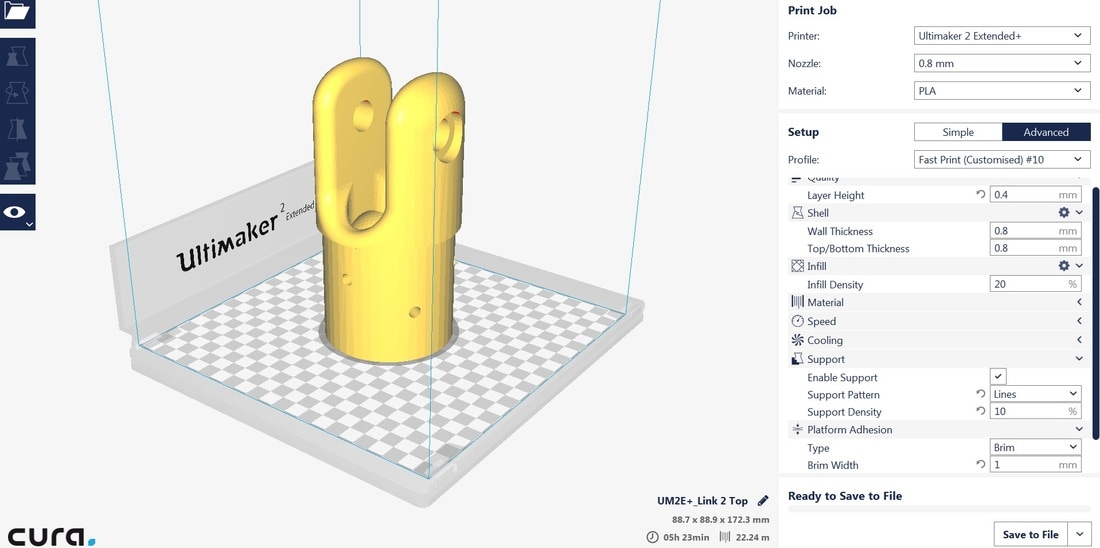
Link 2 Top Suggested Orientation and Settings
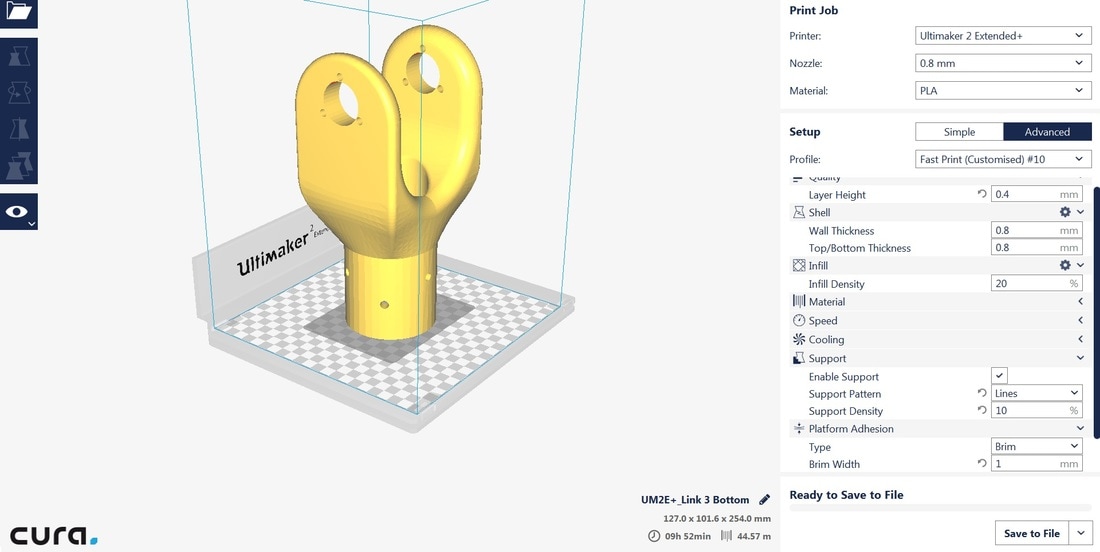
Link 3 Bottom Suggested Orientation and Settings
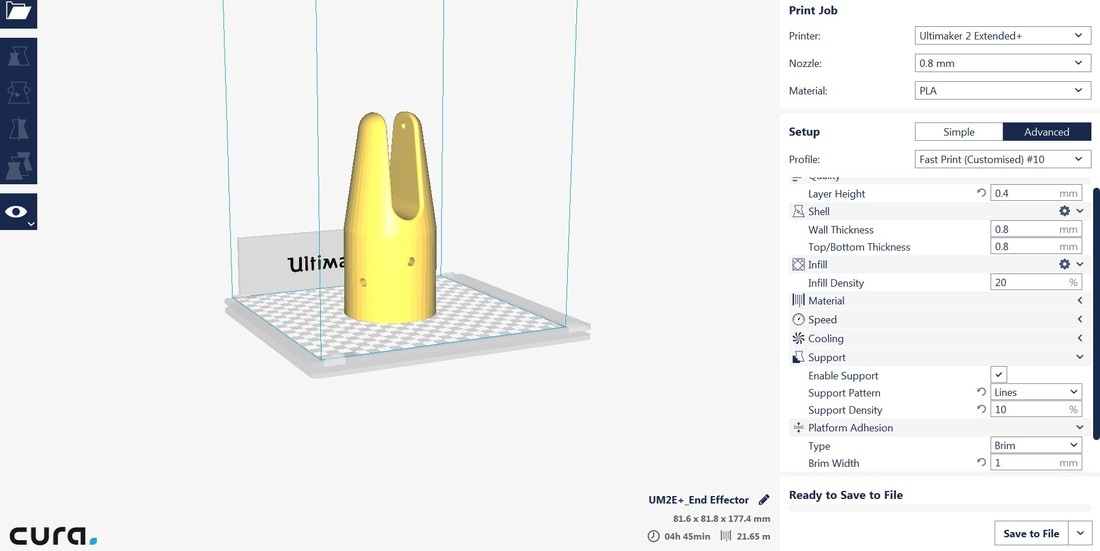
End Effector Suggested Orientation and Settings
Link 1 will require modification of the build volume settings. This can be done in Cura 15.04.6 under Machine>Machine Settings. Due to shrinkage, it is highly recommended that Link 1 be printed in PLA.
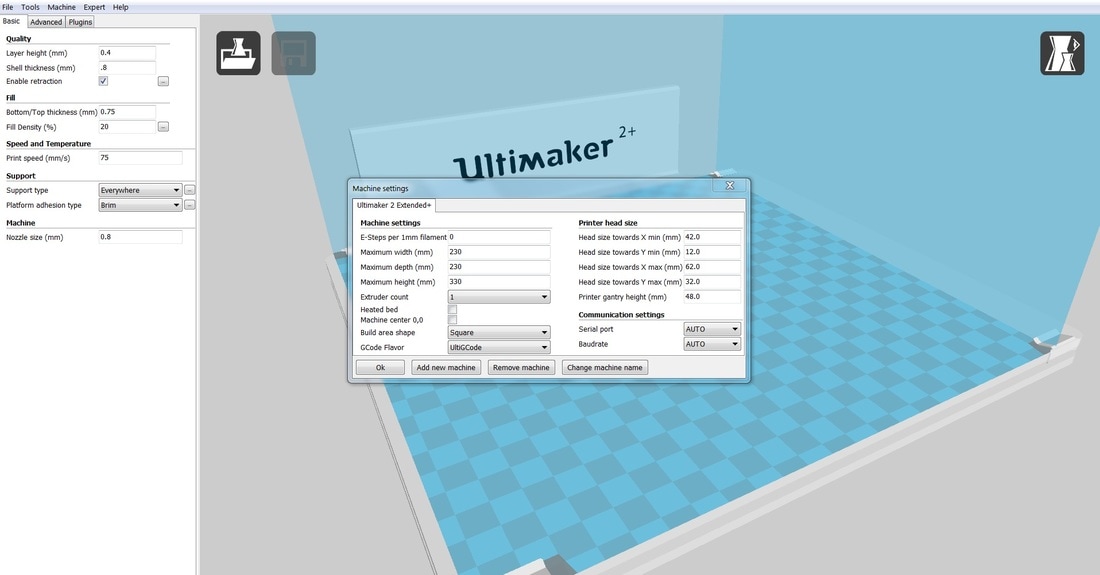
Maximum width and depth should be increased from 223 to 230mm
Link 1 Suggested Orientation and Settings
